Sunday, October 10, 2010

Creamy Pesto Chicken & Pasta!


I found this recipe on the back of a can of Campbell's Cream of Chicken soup. The original name is Creamy Pesto Chicken & Bow Ties but I used penne pasta so I changed the name.

This recipe is super easy but definitely has the "wow factor." The recipe below is from the Campbell's website with minor alterations. I thought the sauce was a little too thick so I reserved some of the cooking water from the pasta and thinned the sauce down a little bit. I think I used a little over a 1/4 of a cup. I think next time I'm going to sprinkle in some freshly diced tomatoes when I add the pasta to the sauce. It will not only add color but compliment the creaminess of the sauce. After I plated it, I sprinkled fresh shaved Parmesan and a little fresh parsley on top.


Creamy Pesto Chicken & Pasta

Ingredients:
2 tablespoons butter
4 skinless, boneless chicken breast halves (about 1 pound), cut into cubes
1 can (10 3/4 ounces) Campbell's® Condensed Cream of Chicken Soup (Regular or 98% Fat Free)
1/2 cup pesto sauce
1/2 cup milk
3 cups penne pasta, cooked and drained (reserve some of the pasta water)

1. Heat the butter in a 10-inch skillet over medium-high heat. Add the chicken and cook until well browned, stirring often.

2. Stir the soup, pesto sauce and milk in the skillet and heat to a boil. Reduce the heat to low. Cook for 5 minutes or until the chicken is cooked through. Stir in the pasta and cook until the mixture is hot and bubbling. If the sauce is too thick, use the reserved pasta water to thin it down until you feel it's the right consistency.

3. Garnish with shaved Parmesan cheese and chopped parsley and enjoy!

Thanks for stopping by my kitchen!

Tuesday, May 25, 2010

Southern Banana Pudding!


I saw this recipe on a blogging buddy's blog today and had forgotten all about it. I had it years ago at a picnic. It was so good that I told myself that I would make it someday. Well a ton of years later and thanks to Darlene for the reminder, today is the day! I dropped Allison off at school and went directly to the store for the ingredients.

It is so easy and the recipe is right on the large box of JELL-O Banana Cream Pudding!

I noticed that Darlene didn't put the Cool Whip on the pudding which is a great idea if you have some people that don't care for it. I'm not a big fan of it on pie but I'm okay with it in a dessert like this. I followed the directions on the box and knowing my family is fine with Cool Whip, I went ahead and put it on top.

Southern Banana Pudding

Ingredients:
2 1/2 cups cold milk
1 large pkg. (5.1 oz) of JELL-O banana cream instant pudding
30 vanilla wafers (I used generic and they were a little smaller so I ended up using more)
3 bananas, sliced
1 tub (8 oz.) Cool Whip topping, thawed

Directions:
~Beat milk and pudding mix with whisk for 2 minutes. Let stand 5 minutes.
~Arrange layer of wafers on bottom and up side of 2-quart bowl.
~Top with layers of 1/2 each of the bananas and pudding.
~Repeat layers.
~Cover with Cool Whip and refrigerate for 1 hour.

**I added some crushed up vanilla wafers on top for garnish. You could also decorate the top with sliced bananas dipped in lemon juice. The crushed wafers were easier and I like things easy peasy!

Thanks for stopping by my kitchen!
Thursday, May 20, 2010

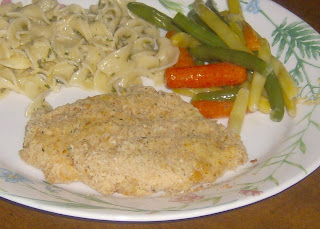
Garlic Herb Chicken!

I made this for dinner last night and it was a big hit.

It's a variation of a recipe I saw on Cheryl a.k.a. Tidy Mom's blog and she changed a recipe she saw in a cookbook to get her recipe. I love being inspired by other bloggers!

Anyway. Hers was actually Breaded Pork Medallions but I used Chicken and they weren't medallions so I changed the name to what was comfortable for me.

Here's a link to her recipe. Mine is below.

Garlic Herb Chicken

Ingredients:
4 (4 oz.) boneless, skinless chicken breasts
4 triangles of Laughing Cow Garlic & Herb Spreadable Cheese
1 1/2 cups Italian style bread crumbs (I used Cheryl's measurement because I didn't measure mine. I just dumped it in the bowl.)

Directions:
~Preheat oven to 375°
~Rinse chicken breasts in cold water and pat dry with paper towels.
~Place chicken on a large cutting board and cover with 3 layers of plastic wrap. Pound with a kitchen mallet until about 1/4" to 1/2" inch thick. This will allow for even cooking and also gives you a very tender product because it breaks up the meat a bit.
~Using a butter knife, spread one triangle of cheese on the top of each breast.
~Coat each side in the bread crumbs.
~Place on a sheet pan which has been sprayed with non-stick spray.
~Spray the top of each breast with more non-stick spray.
~Bake for 20-25 minutes or until chicken is done.

I served mine with Parmesan parsley noodles and vegetables. Yummy!

Thanks for stopping by my kitchen!

Monday, March 29, 2010

Menu Plan Monday ~ Mar. 28th!

It's Monday again so you know what that means!

Yes! Menu Plan Monday!

When you are done seeing what my family is having for dinner this week, click on the button below to see what others are cooking up this week!


Anything in Green letters is a link to the recipe!

Monday
- Chicken Noodle Soup

Tuesday - Sloppy Joes with Homemade Fries (Allison's request) and Green Beans.

Wednesday - Mesquite Marinated Pork Chops, Scalloped Potatoes and Lima Beans.

Thursday - Pizza Pasta (didn't have this yesterday so I moved it to this week), Tossed Salad and Rolls.

Friday - It's Good Friday so we are heading to the Fish Fry at the local Fire Hall with my parents, sister and niece and nephew.

Saturday - Grilled Cheese and Tomato Soup.

Sunday - Easter Dinners with my family around Noon and in the evening with Curtis's family.
I'll be taking Pistachio Pudding Cake with me!


Thanks for stopping by my kitchen!

Tuesday, March 23, 2010

Allison's Baked White Fish!

Allison is quite the creative cook and this is one of her creations. I should say one of her best creations yet. It was really flavorful and yummy!

She created it because . . . well, SHE sat on a bag of potato chips and didn't want to eat broken chips.

Yes, that's right. I told her she was going to eat the crushed chips because she wasn't paying attention and sat on the bag. I told her didn't care if she had to eat them with a spoon but we weren't throwing them out. I know. . . it was one of my mean moments.

Well if you read my other blog and know anything about my daughter, she is a problem solver. Yes, that she is. I believe that when she grows up, she's going to make an amazing contribution to society. Hey! I'm her Mom. I'm allowed to dream about her future!

Okay, let's get to the recipe. I guess it's not really a recipe but more of a method so I'll just try my best to write it up.

Allison's Baked White Fish

Ingredients:
White fish fillets, Flounder, Haddock, Cod, Halibut, Orange Roughy, etc.
Potato chips, almost a full regular bag
1 egg
milk, just a little to loosen up the egg
pepper
Cajun seasoning
dried chopped parsley

Directions:
1. Place potato chips in a zippered bag and crush to crumbs with a rolling pin.
2. In a bowl, beat egg and add a little milk to loosen the egg. Season with pepper. There is enough salt in the potato chips so you won't need it.
3. Dip fish fillets into egg/milk mixture and then cover with potato chip crumbs.
4. Place on a baking sheet that has been lined with foil and sprayed lightly with non-stick cooking spray.
5. Sprinkle desired amount of Cajun seasoning and a little parsley for color on top of fillets.
6. Bake in a 375 degree oven until done. This will depend on how thick your fillets are. I cooked them until they were almost done and then raised the oven to 400 degrees to crisp the breading.

Thanks for stopping by my kitchen!

Monday, March 22, 2010

Menu Plan Monday ~ Mar. 22nd!

Hey Friends!

Thanks for stopping by and visiting my cooking blog to see what we are having for dinner this week.

When you are finished here, you can click below and head on over to the Organizing Junkie's site to see what others are having for dinner this week too.

Remember, you can click on any of the dinner items in color and it will take you to the recipe.

Monday - Slow cooker Beef Stroganoff

Tuesday - Chicken Divan


Thursday - Pork Tenderloin, Baked Potatoes and Corn (This was moved from last week's menu since Curtis surprised us one night and took us out to dinner and this Mom didn't have to cook!)

Friday - Baked Lemon Pepper Fish, Buttered Parmesan Noodles and Green Beans

Saturday - Pizza Pasta with Tossed Salad and Fresh Baked Rolls

Sunday - Dinner at Grandma's

Thanks for stopping by my kitchen!

Sunday, March 21, 2010

Slow Cooker Beef Stroganoff!


Several weeks ago my blogging friend, Darlene of Darlene's Days tried a Slow Cooker Beef Stroganoff recipe. Her family loved it and after reading her rave reviews on her blog, I decided to make it for dinner that night.

I didn't have any stew meat or the right canned soup so I made a few adjustments and incorporated some of Darlene's suggestions and it came out PERFECT!

You can click here for the original recipe and the recipe I am listing below is the one I've adjusted and will continue to use.

Slow Cooker Beef Stroganoff

Ingredients:
1 pound of sirloin steak (2 steaks), fat trimmed off and cut into strips
1/2 cup onion, chopped
1 Tbsp. olive oil or just enough to cover the bottom of the pan
1 can of cream of mushroom soup
1 small can of sliced mushrooms
1 packed of French onion soup mix
1 Tbsp. Worcestershire sauce
1/4 cup water
4 oz. cream cheese
Sour cream for top, optional
egg noodles or white rice

Directions:
1. In a medium saute pan, heat olive oil on an almost high setting. When the oil is hot and rippling, add the steak and onions. Sear the steak on all sides to give it a dark brown color on the outside. Do not cook it through. You just want to seal in the juices.
2. After the meat and onions are seared, place them in a slow cooker and add the soup, mushrooms, package of soup mix, Worcestershire sauce and water. Stir well to combine.
3. Cook on low setting for 8 hours or high setting for 5 hours.
4. Stir in cream cheese just before serving.
5. Serve over cooked egg noodles or white rice.

Thanks for stopping by my kitchen!

Monday, March 15, 2010

Menu Plan Monday ~ March 15th!

If you are a regular visitor to this blog, I'm starting a new feature this week. I'll be sharing my weekly menu every week by joining Menu Plan Monday over at I'm an Organizing Junkie! Click here to see what others are having for dinner this week!

If you usually follow my other blog, welcome to my cooking blog! I hope you take a look around and enjoy some of my recipes. I'll be adding more this week so be sure and become a follower so you won't miss them! Most of them are easy, quick with not a lot of ingredients but high on taste because this Mom doesn't have time to spend hours in the kitchen or doesn't want to get out 20 ingredients to make dinner!

You an click on any of the items in red to take you to the recipe.

Monday
- Crock Pot Chili and dinner rolls (which I put together last night while I was cleaning up the dinner dishes! We eat late on Mondays since Allison goes to gymnastics and if she eats before, she is sluggish and not focused. So I try to do either a slow cooker recipe or a casserole so it cooks while we are there.)

Tuesday - Chicken Fajitas

Wednesday - Scalloped Potatoes & Ham with Green Beans

Thursday - Spaghetti & Meatballs with Salad and Italian Bread

Friday - Shrimp Kabobs, Rice Pilaf and Broccoli


Saturday - Pork Tenderloin, Baked Potatoes & Corn

Sunday - Dinner at Grandma's.

Thanks for stopping by my kitchen!

Sunday, February 7, 2010

Blueberry Cream Cheese Braided Loaf!

Oh my goodness!!! This is amazing. I saw it last week on Rhoda's Southern Hospitality Blog and KNEW I had to make it!

I made it yesterday and now I can't walk into the kitchen without wanting another piece! It is truly delicious!

If you don't like blueberries, don't sweat it. It would be just as good with strawberries, raspberries, blackberries, canned drained peaches...well, you get the idea.

You can click on the link above in purple to see the recipe on Rhoda's blog. She made a couple of adjustments and the recipe below reflect those adjustments. This recipe is SUPER easy and I hope you try it!

Blueberry Cream Cheese Braided Loaf

Ingredients:
8 oz. cream cheese, softened
1 large egg, separated
1 1/4 cup confectioners sugar, divided
1 (11 oz.) refrigerated breadstick dough
1 cup fresh or frozen blueberries, rinsed, drained and dried
2 tsp. water
2 Tbsp. orange juice

Directions:
1. Preheat oven to 375 degrees. Lightly grease a baking sheet.
2. Beat cream cheese in a mixing bowl at med. speed with an electric mixer until creamy. Add egg yolk and 1/4 cup confectioners sugar. Beat until well mixed. Set aside.
3. Remove breadstick dough from can. Unroll and separate dough into rectangle. Place dough horizontally on baking sheet. Press seams together to seal.
4. Spoon cream cheese mixture onto center third of dough.
5. Sprinkle blueberries over cream cheese mixture.
6. Separate dough at perforations up to cream-cheese mixture slightly stretching dough strips. Beginning at top edge of dough, braid strips to cover filling (this makes more sense as you are doing it). Tuck last 2 ends under at bottom of loaf.
7. In a small bowl, beat egg white and water with fork until blended to form an egg wash. Brush egg wash over braided loaf.
8. Bake until golden brown, approx. 20 minutes. Cool for at least 45 min.
9. In another small bowl, combine remaining 1 cup confectioners sugar and orange juice, whisking until smooth. Drizzle glaze over braided loaf before serving. Slice with bread knife.
10. Enjoy and try not to each too much!

Rhoda's braid was prettier than mine but you get the idea. Also, please don't comment on the condition of my baking sheet. I LOVE my old seasoned sheets! They work the best!

I know this looks a little brown but it's not that brown in real life. Just be sure to watch yours in the oven. My oven is a little hotter than it should be so I baked mine for 17 minutes.

Thanks for stopping by my kitchen!

Wednesday, February 3, 2010

Hash Brown Casserole!

I've seen this recipe called everything from party potatoes to funeral potatoes but we call it Hash Brown Casserole here in Western Pennsylvania.

Of course, it's another easy recipe...just my style.

I generally use store brands for everything in this recipe and it works just fine. I've also mixed in ham cut up in cubes and added green beans on the side to make it a complete meal. I don't make it very often because it makes a lot for my little family. I usually save it for family get togethers. My favorite thing to serve this with is barbecued chicken and lima beans. I don't know why, all the flavors just blend for me.

My family loves the topping and the original recipe wasn't enough for them so I double it. The recipe below reflects that change.

Hash Brown Casserole

Ingredients:
2 lbs. frozen hash browns
16 oz. sour cream
1 can cream of chicken soup
1/4 tsp. pepper
2 cups shredded cheddar cheese
2 sticks of melted butter (1 stick for base and 1 for topping so keep them separate)
4 cups corn flakes

Directions:
~Mix the first 4 ingredients and 1 stick of melted butter together well in a very big bowl.
~Add the hash browns to the mixture.
~Put the mixture into a greased 9 x 13 casserole dish.
~Crush the corn flakes in a Ziploc bag.
~Add 1 stick of melted butter to the crushed corn flakes.
~Put corn flake mixture on top of base.
~Bake at 350 degrees for 1 hr. 15 min.
~Let sit for 10 minutes.


Thanks for stopping by my kitchen!

Tuesday, February 2, 2010

Chilled French Apple Dessert!


Since I've been posting all those calorie rich recipes lately, I thought it's time that I slim things down.

This recipe is a Weight Watchers dessert and has a POINTS® Value of 4 per serving.

I wasn't too sure about it but it was surprisingly delicious. Curtis and Allison both gave it a thumbs up.

Chilled French Apple Dessert

Ingredients:
27 average cinnamon graham crackers squares
2 1/2 cups canned sweetened chunky applesauce
6 oz. light artificially sweetened vanilla yogurt
1 cup lite whipped topping
1 tsp. ground cinnamon

Instructions:
1. Line bottom of an 8-inch square pan with nine graham crackers.
2. In a small bowl, combine applesauce and yogurt.
3. Pour half of mixture onto graham crackers, layer with nine more crackers and repeat. Top with remaining nine squares.
4. Spread whipped topping over top and sprinkle with cinnamon, if desired. Chill 2 hours. Cut into 8 pieces and serve.

Thanks for stopping by my kitchen!

Monday, February 1, 2010

Calico Baked Beans!

Don't you just love great baked beans? I know I do!

This recipe come from my BFF's Mom, Sandy. She's like my second Mom and graciously passed this recipe to me when I fell in love with it.

:::WARNING!::: This recipe makes a lot! Really! I mean it! So if you only have a few people in your family, you will be eating it for days or you can freeze half of it for another time. I always make it for a party because I'm afraid that if I have it for days at a time, I'll not like it anymore. You know. Too much of a good thing isn't always a good thing.

Calico Baked Beans

Ingredients:
1 lb. bacon
1 lb. ground beef
1 onion, chopped
1 medium can of Campbell's Pork and Beans
1 can Kidney Beans
1 can Lima Beans (drained)
1 cup brown sugar
1 cup ketchup
1 tablespoon vinegar
1 tablespoon yellow mustard

Directions:
~Cook off 1 pound of bacon, drain and when cooled, crumble.
~Brown 1 pound of ground meat with chopped onion. Drain grease.
~Add all ingredients into a big bowl and mix together well.
~Bake at 350 degrees covered in oven safe cookware for 45 minutes.

Thanks for stopping by my kitchen!

Sunday, January 31, 2010

Almond-Orange-Peach Crescents!

A few years ago I saw Rachael Ray make Almond-Orange-Apricot Crescent Rolls on her 30 Minute Meals show. I liked the idea but I didn't have apricot or sesame seeds so I improvised and used what I had on hand.

These have now become a favorite with the Farmer's Breakfast Casserole in our family. See previous post for that recipe.

Almond-Orange-Peach Crescents

Ingredients:
1 package of Pillsbury crescent roll dough
3 Tbsp. orange marmalade
3 Tbsp. peach preserves
1 egg, beaten
1/4 cup sliced almonds

Directions:
~Preheat oven to the instructions on your crescent roll package.
~Roll dough out on a cookie sheet and break apart triangles.
~Combine orange marmalade and peach preserves in a bowl and stir well with a teaspoon to break down the preserves to a spreadable consistency.
~Using the back of the teaspoon, spread a thin layer onto the crescent dough and roll it up per the package directions.
~Using a pastry brush, brush the beaten egg on top of the rolled crescent and sprinkle sliced almonds on top.
~Bake per package instructions until done or lightly golden. Serve warm.

Note:
~Substitute apricot, pineapple, cherry, red raspberry, strawberry or blueberry preserves for the peach. Yum! You are only limited by your imagination.

Thanks for stopping by my kitchen!

Saturday, January 30, 2010

Farmer's Breakfast Casserole!

I found this recipe online about 7 or so years ago. It's from the Strutton Inn Bed and Breakfast in Custer, South Dakota. I'm so glad I printed it out and didn't lose the recipe because the link I have bookmarked doesn't work anymore.

Anyway. I needed a way to make a quick breakfast on Thanksgiving and Christmas mornings before we start our travels to my parents' and Curtis's parents' homes. Although I did make it the other night for dinner and everyone was so excited. I guess I need to make it more often instead of just on the holidays.

This recipe is perfect because I make it the night before and pop it in the oven in the morning before anyone gets up. It's easy to put together and there isn't any prep in the morning so there is less clean up too!

Farmer's Breakfast Casserole

Ingredients:
3 cups frozen shredded hash brown potatoes
3/4 cup cheddar cheese, shredded
1 cup cooked ham or Canadian bacon, diced
1/4 cup green onions, sliced
4 eggs, beaten
1 12oz. can evaporated milk
1/4 tsp. pepper
1/8 tsp. salt

Directions:
~Grease a 2 quart square baking dish. Arrange potatoes evenly in the bottom of the dish.
~Sprinkle with cheese, ham, and green onion.
~In a medium bowl, combine eggs, milk, pepper and salt. Pour egg mixture over ingredients in the baking dish. (At this point, you can cover the dish and refrigerate over night or several hours.)
~Bake uncovered in a 350 degree oven for 40-45 minutes or until center appears set. ***If the casserole was made ahead and chilled, you will need to bake it for 55-60 minutes.
~Let stand 5 minutes before serving. Serves 6.

Notes:
~Instead of ham, try with ground pork sausage that's already been browned and drained.
~Try substituting pepper jack cheese for the cheddar.
~Can substitute 1 cup frozen egg product for eggs.
~Can use evaporated skim milk instead of regular for a lighter recipe.

Stop back tomorrow and see what I serve with this casserole!

Thanks for stopping by my kitchen!

Friday, January 29, 2010

Shrimp Kabobs!


My BFF, Susan, and I were chatting on the phone the other day about adding more fish and seafood to our meal plans. I love fish and seafood but don't cook a whole lot of it.

Coincidentally, I just happened to have Shrimp Kabobs on my menu this week to use up some I had in the freezer.

I usually make them the same way but this time I decided to check out some recipes on the web. I took the base of one and then put my own spin on it. I baked these in the oven because it's in the middle of winter and we are having a snow and wind storm but I can't wait to do them on the grill when it warms up outside.

Shrimp Kabobs

Ingredients:
1 lb. of shrimp (I used 31-40 deveined with tails off)
1/4 cup olive oil
2 tsp. minced garlic (I use the minced garlic in a jar)
2 tsp. lemon juice
1 tsp. paprika
1 tsp. dried parsley
1/4 tsp. black pepper.

Directions:
~In a measuring cup mix together olive oil, garlic, lemon juice, paprika, parsley and black pepper.
~Rinse and drain shrimp.
~Place shrimp in a quart size zipper freezer bag and add marinade to the shrimp. Seal bag well and toss around to make sure all shrimp are coated well. Place in refrigerator to marinate for at least 2 hours.
~After two hours, take out of refrigerator and place shrimp on skewer. Discard marinade.
~Grill or bake at 350 degrees until shrimp turns pink. Mine only took 10 minutes. Grilling will probably take shorter. Just be sure not to overcook the shrimp or it will turn rubbery.

Notes:
~This is a marinade so be sure to prep this at least 2 hours before cooking.
~If you are using metal skewers, be sure to oil them before you add the shrimp to them.
~If you are using bamboo skewers like I do, you will need to soak them in water for a couple of hours. This will prevent them splintering and catching on fire in the oven or on the grill.

Before Cooking:

After Cooking:

Thanks for stopping by my kitchen!

Thursday, January 28, 2010

Easy Chicken Pot Pie!


Have you noticed that 90% of the recipes I post on my blog are easy peasy lemon squeezy?

I love easy! I don't have time to spend hours in the kitchen every day! In fact, I don't know many wives and Mothers that do have the time. Anyway. I think it's pointless to do everything from scratch when there are so many great products out on the market these days.

In this recipe, I took advantage of one of those products...already prepared pie crusts that you find in the dairy section at the grocery store. Using them enables you to make this pot pie in minutes.

Another thing that I also pick up sometimes when they are on sale is the baked chickens that the grocery stores carry. I will bring it home, clean it and freeze the chicken so I can use it in recipes later. It cuts my cooking time tremendously!

Chicken Pot Pie

Ingredients:
1 box of Prepared Pie Crusts, let sit at room temperature for 15 minutes
1 - 1 1/2 lbs. of Chicken, cooked and diced
1 1/2 cups of Frozen Mixed Vegetables
1 can of Diced Potatoes, drained
1 can of Cream of Chicken Soup
Salt and Pepper, to taste

~Preheat oven to 425 degrees F.
~In a large bowl, add prepared chicken, frozen vegetables, diced potatoes, soup, salt and pepper.
~In a pie plate (I use a glass one), line the bottom with one of the prepared pie crusts.
~Put the chicken, veggie and soup mixture in the pie plate on top of the first crust.
~Cover with the second pie crust. Fold the edges under the bottom edges and pinch the two together.
~Using a sharp knife, cut some air holes into the top crust so pie doesn't build up steam and explode.
~Cover the edges of the crust with foil so it doesn't burn before the whole pie cooks.
~Bake with the edges covered for 20 minutes.
~After the first 20 minutes, remove foil and bake for another 20 minutes.
~Let sit for 10 minutes to set.

Thanks for stopping by my kitchen!

Wednesday, January 27, 2010

Scalloped Potatoes & Ham!

Yum! This is the ultimate comfort food!

I try not to make it too often because it's not that great for the hips or the arteries!

The recipe below is my got to scalloped potatoes & ham recipe. I have another one for the slow cooker but this one is way more delicious!

I do have to admit here that don't always follow the recipe exactly. I like mine saucy so I end up putting in more milk and cheese to the roux. The picture below is when it came out really saucy but it was perfect after I let it sit a while. Also, if your family likes onions, feel free to chop up a medium one and throw it in with the potatoes and ham.

Scalloped Potatoes & Ham

Ingredients:
1/2 cup butter
1/2 cup flour
1/2 tsp. pepper
3 cups milk
3 cups cheddar cheese, shredded
5 cups potatoes, washed & sliced
3 cups ham, cooked and diced

Directions:
~Preheat oven to 350 degrees.
~Put sliced potatoes and diced ham in a large bowl and set aside.
~In a large sauce pan, melt butter over low to medium heat. Then whisk the flour in and continue to whisk and cook for about 1-2 minutes. It will be dry but it's important for you to cook off the raw flour taste and allow the butter and starch granules to mix.
~Remove from the heat and slowly mix in the milk.
~Return the pan back to the heat and cook until it's a thick and bubbly white sauce.
~Remove from heat and add in the pepper and cheddar cheese. Stir until the cheese melts.
~Add white/cheese sauce to potatoes and ham and mix well.
~Put into a well greased 9 x 13 baking dish and cover with foil.
~Bake covered for 30 minutes.
~Uncover and bake for 1 hour more.
~After you remove it from the oven, let it sit for 10-15 minutes before serving.

Thanks for stopping by my kitchen!

Tuesday, January 26, 2010

Slow Cooker Taco Soup!


This recipe is super easy! The best part is that it's a slow cooker recipe. I LOVE my slow cooker!

The most time consuming part of it is browning the ground beef. My trick to that is I usually already have browned ground beef in the freezer for recipes like this or to throw in pasta sauce. If you need step by step instructions with pictures, you can click here since I had posted this recipe on my other blog first.

Slow Cooker Taco Soup

Ingredients:
1 pound ground beef, browned and drained
a small onion, diced or 2 Tbsp.dried minced onions
1 can of kidney beans
1 can of black beans, drained and rinsed
1 can of whole kernel corn, drained
1 can of diced tomatoes
1 can tomato sauce (I use 8 oz. because I like it thick.)
1 small can of diced green chiles
1 packet of your favorite taco seasoning mix

Directions:
~Place everything in a slow cooker and mix well.
~Cook on low for 8-9 hours or on high for 4-5 hours.
We top it with shredded cheddar cheese, sour cream and green onions and serve it with tortilla chips on the side.

Thanks for stopping by my kitchen!
Monday, January 25, 2010

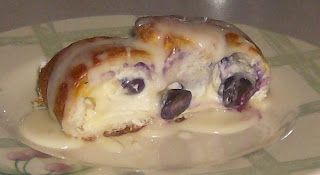
Blueberry Squares or Any Fruit Squares!


This recipe came from my Aunt Carole over 25 years ago. She used to make "Cherry Squares" but I'm not a big fan of cherry pie filling...which is what you use in this recipe. My favorite fruit pies are blueberry or peach so that's what I make.

Let me take a moment here and share with you that this is an award winning recipe. Yes, that's right! I entered it into a local recipe contest when I was about 18 and won 1st runner up! Don't be too impressed, my prize was just a $50 savings bond but I was thrilled with it!

Blueberry Squares or Any Fruit Squares

Ingredients:
1 1/2 cups sugar
1 cup butter or margarine
4 eggs
2 cups flour
1 tablespoon vanilla
1 can of blueberry pie filling (or any kind)

Directions:
~Cream sugar and butter until light and fluffy.
~Add eggs, one at a time.
~Add flour and vanilla and beat well.
~Pour batter in a well greased 9 x 13 pan.
~Mark 20 squares.
~Pour one tablespoon of pie filling in each square.
~Bake at 350 degrees for 35 to 40 minutes.
~Dust with powdered sugar. (Cinnamon & Sugar on Apple.)

Thanks for stopping by my kitchen!

Sunday, January 24, 2010

Simmered Cabbage!


Over the next several weeks, I will be transferring some recipes from my main blog, "This is My Life." These were posted over there before I started this cooking blog and now I think it's time to get them all in one place.

I found this recipe on Recipe Zaar and fell in love with it! I love cabbage and this is a perfect low calorie but very flavorful side dish. Although, I could just eat a bowl of it for lunch and be perfectly happy!

The recipe below is the exact recipe as I found it on Recipe Zaar. The items in red are my comments for adjustments and if you want to see my step by step instructions in pictures, click here.

Simmered Cabbage

Ingredients:
1/2 head cabbage, chopped into approx 1 inch squares or pieces (I used 8 cups)
1 tablespoon olive oil
1 tablespoon butter
1/2 teaspoon salt, to taste
1/4 teaspoon fresh ground pepper, to taste
1 cup chicken broth or vegetable broth (I prefer it with the chicken) (Me too!)
3 tablespoons dry sherry (optional) (I didn't use this)

Directions
1. Heat oil and butter in large heavy and wide saucepan or saute pan; add cabbage, salt, pepper, and stir over low heat for 5 minutes.
2. Add broth (I usually add a bit of sherry, too )and bring to boil, cover and simmer over medium-low heat, stirring often, for about 15 minutes or until cabbage is tender.
3. Raise heat to medium, uncover and let juices reduce to about half (be careful not to let burn). 4. Taste and adjust seasoning, serve hot.

Thanks for stopping by my kitchen!

Saturday, January 23, 2010

Chicken Divan!


The other day on Rachael Ray, she made a chicken divan noodle something or other dish. It made me think about a Chicken Divan recipe I used to make. I had copied it down years ago from Live with Regis & Kathie Lee. Do you all remember when Kathie Lee Gifford was his co-host? Oh come on...it's only been about 8 years!

Anyway. I dug out my recipe and quickly remembered what I didn't like about it. It makes a ton! The recipe calls for 4 boxes of 10 oz. weight broccoli. That's 40 ounces of broccoli! Way too much for my little family.

Yes, I could just cut the recipe in half but I decided to go to the web and see what other variations I could find. As always, I found a few and used a little bit of this one and a little bit of that one to come up with my own. I hope you like it!

Chicken Divan

Ingredients:
16 oz. chicken breast, boiled, cooled and cut into slices
2 (10 oz. ea.) packages of frozen broccoli
2 cans of cream of chicken soup
1/2 cup mayonnaise
1/2 cup sour cream
1 teaspoon lemon juice
1/2 teaspoon curry powder
1 cup shredded sharp cheddar cheese
2 Tbsp. butter, melted
1/2 plain bread crumbs
1 tsp. chopped dried parsley

Directions:
1. In a large sauce pan, cook broccoli in boiling water until tender but still crisp..
2. In a greased casserole dish (mine was about 10 1/2 x 7 1/2 inches), layer broccoli in a single layer on the bottom.
3. Layer the prepared chicken evenly over the broccoli.
4. In a mixing bowl, combine the soup, mayonnaise, sour cream, lemon juice and curry powder. mix well and pour evenly over chicken layer. Using a spatula, push the mixture down into the chicken a little.
5. Sprinkle the casserole with cheddar cheese.
6. Mix butter and bread crumbs together. Sprinkle on top.
7. Sprinkle with chopped parsley for color.
8. Bake at 350 degrees for 35 -40 minutes until heated through and lightly browned.

Thanks for stopping by my kitchen!

Friday, January 22, 2010

Cauliflower & Broccoli Soup!


I had a big head of cauliflower and some broccoli in my veggie drawer that I needed to use but didn't know quite how I was going to do that.

I decided to check out The Pioneer Woman's website to see if she had any recipes for either of my veggie friends. She did! She has a recipe on her site for Cauliflower Soup. Well that solved half my problem...but she uses 1 1/3 heads of cauliflower...oops, I only had 1 head. So the obvious solution was to make Cauliflower AND Broccoli Soup! Problem solved!

Here is a link to Ree's recipe on her site, The Pioneer Woman. The recipe below is for what I made...Cauliflower & Broccoli Soup. It's her recipe but just with 1 head of cauliflower and to small head of broccoli.

Be warned...this makes a ton! I shared 5 pints with the neighbors and I still have about 4 pints left for us...plus the two bowls I had for lunch! YES! It was that good!

Cauliflower & Broccoli Soup

Ingredients:

1 stick butter, divided
½ whole onion, finely diced
1 whole carrot, finely diced
1 stalk celery, finely diced
1 whole cauliflower head, roughly chopped
2 small broccoli heads, roughly chopped
2 Tbsp. fresh or dried parsley, chopped
2 quarts (64 oz.) low-sodium chicken broth or stock
6 Tbsp.all-purpose flour
2 cups whole milk
1 cup half-and-half
2 tsp. to 4 tsp. salt, to taste
1 cup (heaping) sour cream, room temperature

Directions:
1. In a large soup pot or dutch oven, melt 4 tablespoons butter. Add the onion and cook for a few minutes, or until it starts to turn brown. Add the carrots and celery and cook an additional couple of minutes. Add cauliflower, broccoli and parsley and stir to combine. Cover and cook over very low heat for 15 minutes. After 15 minutes, pour in chicken stock or broth. Bring to a boil, then reduce heat and allow to simmer.
2. In a medium saucepan, melt 4 tablespoons butter. Mix the flour with the milk and whisk to combine. Add flour-milk mixture slowly to the butter, whisking constantly until a thick white sauce. Remove from heat and stir in 1 cup half-and-half. Add mixture to the simmering soup.
3. Allow to simmer for 15 to 20 minutes. Check seasoning and add more salt or pepper if necessary.
4. Just before serving, place the sour cream in a serving bowl or soup tureen. Add two to three ladles of hot soup into the tureen and stir to combine with the sour cream. Pour in remaining soup and stir.
5. Serve immediately.

Thanks for stopping by my kitchen!

Thursday, January 21, 2010

Steak Salad - Pittsburgh Style!

What is a Steak Salad -Pittsburgh Style, you ask? WELL! Let me tell you that if you have never had one, you are missing out!

It may sound odd to those of you who have never been to Western Pennsylvania or specifically to the Pittsburgh region but please don't judge it until you try it. It is amazing! Actually, it's the number one item that I order from the menu when we go out to restaurants.

So without further ado, let me introduce you to my favorite dinner salad...The Steak Salad - Pittsburgh Style!


Ta Da!!!

Doesn't it look yummy??

I know you all are thinking that I've lost my mind.

French fries on a salad?

YES, french fries on a SALAD!

Jerry's Curb Service ,back in the county I grew up in, is credited with inventing this Steak Salad. You can read about how it came about by clicking here. Even though they invented it, it is now on EVERY menu of every restaurant you frequent in Pittsburgh region. You can also be sure that if a chain restaurant in this area has a steak salad on their menu that doesn't come with fries, the diner will most definitely add a side of fries to their order. It just isn't the same without fries!

Since there are many variations of the Steak Salad, it would be wrong of me to claim that the recipe I am posting is the correct one. In truth, there is no correct one. However, you do need 5 basic components to make up a steak salad in my opinion. They are lettuce, vegetables, cheese, steak and fries. The recipe below is the one I make at home...it's the one in the picture. Below it, is a list of other options for you. They all work, just make sure you don't forget the fries!

Oh! Dressing! I can't forget to talk about dressing! Some people will tell you that Ranch is the way to go. Others will argue that Italian is the best. I, of course, have my own opinion on that! Maybe it's just me being odd but honestly for me it depends on the combination in the salad! Certain restaurants I order it at, I like Ranch...at other places I like Italian or Bleu Cheese or Sweet & Sour or Country French or I've even been known to mix Italian & Bleu Cheese...I know it sounds gross but it's really not! When I was still in high school, I was a waitress. I use to wait on this lady and she would come in and order the steak salad with a cup of beef gravy on the side. She would pour it over the whole salad...lettuce and all! Now THAT is gross!

Cindi's Steak Salad - Pittsburgh Style

Ingredients:
Iceberg lettuce, washed, chopped and chilled
Carrots, shredded
Cucumbers, peeled and sliced
Tomatoes, chopped
Cheddar Cheese, shredded
Olive oil
Steak, cut into bite sized pieces
Steak seasoning
French Fries, frozen or homemade oven fries
Dressing of choice

Directions:
1. Assemble lettuce, carrots, cucumbers, tomatoes and cheddar cheese on a dinner plate.
2. Season steak cubes with steak seasoning and fry in a little bit of olive oil until done.
3. Bake fries.
4. Add cooked steak on top of prepared salad.
5. Add fries on top of steak.
6. Cover in dressing.

Options:
~ Use your favorite greens...romaine, leaf, spring mix, etc.
~ Cook a whole steak on the grill or in the oven and cut into pieces after it's done. I like the stove top method because I can make mine medium rare and the others medium.
~ Other topping choices: sliced black olives, green peppers, onion slices, sliced or diced hard boiled eggs, pepperoncini peppers, hot banana pepper rings...as you can see the possibilities are endless.
~ Try different style of fries...shoestring, homemade oven baked, crinkle cut, steak, etc.
~ Use your favorite cheese...mozzarella, Swiss, Monteray jack...shredded or cubed or a combination of a couple.
~ Add a couple of breaded fried onion rings on the top.
~ Put the cheese over the top of the fries so it melts.
~ Another option is to try different proteins...grilled chicken, breaded baked chicken fingers and breaded baked fish...which is really good with 1000 Island dressing.

I hope you try it and come back and let me know what you think. And for those of you in the Beaver County/Pittsburgh area and already love this salad, let me know what restaurant out there has the best!

Thanks for stopping by my kitchen!

Wednesday, January 20, 2010

Homemade Pizza!


Homemade Pizza. Is there anything better?

It has become our family tradition that we have pizza on Fridays. I try my best to make it homemade pizza too! It's a memory I want for Allison.

I'll be honest. It's not as hard as you may think. Well, not as long as you have a food processor to do the mixing of the dough...or you can do it by hand if you like. You know me though, I like it easy and the food processor makes it easy!

This recipe will make two 12" pizzas. I usually make one small one for Allison and with the rest of the dough, I make a 14" pizza or a rectangle cookie sheet pizza.

Homemade Pizza

Ingredients:
2 1/2 tsp. active dry yeast or (1 .25 oz.) package
1 teaspoon sugar
1 cup of warm water at 110 degrees
2 1/2 cups flour
2 tablespoons olive oil (plus more for non-stick)
1 teaspoon salt
Pizza sauce
Mozzarella cheese, shredded
Desired toppings (pepperoni, mushrooms, onions, black olives, green peppers, banana pepper rings, ham, sausage, etc.)

Directions:
1. Preheat oven to 450F.
2. In a cereal sized bowl (make sure you bowl is big enough because it will grow to almost double in size), dissolve yeast and sugar in warm water. Let stand until the yeast has been activated and creamy, usually about 10 minutes.
3. In a food processor using your dough beater/blade, put in flour, salt & oil. Carefully add yeast mixture, beat until well blended and forms a ball. Remove dough and place in a lightly oiled bowl double the size of your dough. Cover with lightly oiled wax paper. Let rest for 10 minutes until it almost doubles in size.
3. Gently press the dough down with your lightly oiled hands. Split in half and place on lightly oiled pizza pans. Spread out dough to the edges with your fingers. Let rise again for about 10 minutes.
4. After dough has risen, spread dough with pizza sauce and place in preheated oven until the crust begins to get a very light brown color.
5. Take pizza out and cover with cheese and desired toppings either under or on top of the cheese. Place pizza back in oven until the cheese is gold and bubbly and crust is a darker brown color.
6. Let sit for a few minutes before cutting.

Tips:
~Your oldest, darkest, well-seasoned pans make the best crust. I bought a new one and hate it! It just doesn't get the pizza crust as crispy on the bottom as we like it. I need to season it a bit before I use it again.
~To lightly oil the bowl for the dough, wax paper and my hands, I use a non-stick spray.
~If the dough is springing back when you are trying to spread it out on the pan, place it in the heated oven for just a minute and try again. This usually works and makes it easier to work with.
~I use Ragu Pizza Sauce in the jar but sometimes I take a can of diced tomatoes and crush them then mix them in with the sauce.
~Sometimes I sprinkle olive oil on the crust under the sauce for added flavor...learned this from Allison's Grandma who makes the best homemade pizza.
~To make your pepperoni less greasy, layer it on a paper towel in the microwave and zap it for just a few seconds. Remove it from the oven and pat dry with more paper towels.

Thanks for stopping by my kitchen!

Tuesday, January 19, 2010

Pizzelles!

When you mention pizzelles, you more than likely will get a favorable response. Everyone seems to love these traditional Italian cookies. Well, except me. Yes. I admit it. I do not like them. Don't you dare say I'm not a true Italian because I don't like them! I am just not an anise flavor lover!

My Dad, on the other hand, LOVES these so I make them for him. He did me a favor this morning and to show my appreciation, I made him a batch of his favorite cookies. Let me say that I don't particularly like making them. They are time consuming since you can only make two at a time and they make my house smell like anise...all day long! However, the look on my Dad's face when I told him they were for him, was well worth the time and smell.

The recipe below is for what I call a half batch of pizzelles. It makes about 5 dozen...which may seem like a lot but they go fast on a cookie tray at Christmas...so I double it at Christmas time.

Pizzelles

Ingredients:
6 eggs
1 1/2 cups white sugar
1 cup butter, melted and cooled to room temperature
2 Tbsp. pure anise extract
3 1/2 cups all purpose flour
4 tsp. baking powder

Directions:
1. Preheat your pizzelle iron according the the manufacturer's instructions.
2. Beat eggs and sugar in an electric mixer until they are fluffy. Add in the melted butter and anise extract.
3. In a separate bowl, combine the flour and baking powder.
4. Add the dry ingredient mixture to the wet ingredients, a little at at time. The dough will be thick and sticky.
5.Drop by rounded spoonfuls onto the heated iron. Close and cook for about 90 seconds until lightly browned, or until steam stops coming out of the pizzelle iron. Remove carefully from iron and set on paper towel to cool.
6. Store in an airtight container at room temperature. They also freeze well.

Thanks for stopping by my kitchen!
Monday, January 18, 2010

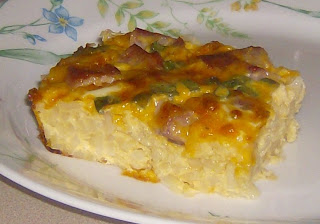
Sausage Mushroom Dip!

This recipe comes from fellow blogger, Sophia, from over at Sentiments from my Kitchen.

You've seen some of her recipes here before and you'll be sure to see some more! She has a great collection and our tastes seem very similar.

Of course, I made an adjustment to it to fit me better. Her recipe called for a half pound of the sausage but I put the whole pound in to make it chunkier. I did use just plain pork sausage but if you use the sage or hot and spicy variety, I would start with the half pound, taste test it and then add more if you want. Her recipe didn't say to chopped up the mushrooms but I went ahead and did that since some of them were big. I couldn't imagine trying to scoop it up with a chip!

Sausage Mushroom Dip

2 cans cream of mushroom soup
2 8 oz. blocks of cream cheese, softened
1 small can of diced green chiles
3 green onions, chopped
1 can of mushrooms, drained and chopped
1 soup can of milk (or thin to the consistency you like) I used about 2/3 of the can
1 pound of roll sausage, browned well, crumbled and drained

1. In a large saucepan add the soup, cream cheese, chiles, green onions, mushrooms, cooked sausage and desired amount of milk. Mix well over medium heat until cream cheese melts and flavors are blend well.
2. Serve warm (a slow cooker works well) with tortilla chips or crackers.

Thanks for stopping by my kitchen!

Thursday, January 7, 2010

Pizza Pasta!


I literally threw this together for dinner the other night. I had planned on pasta but wanted something a little different so I started looking around the kitchen.

I had browned off a pound of Bob Evans's roll sausage to make my breakfast casserole for New Year's Day but only used half of it. I threw the other half in the freezer for later. Well. This was my later and the perfect time to use it up! Hmm, pasta, sauce, sausage...see where I was going with this? Yup! Pizza Pasta!


Here's the best I could do for writing a recipe. I didn't measure anything out because I didn't think I was going to post it. So these are all an approximation of what I used. It worked for my family of three with little leftovers. If you have a bigger family, you'll want to make more and just use the method and not the measurements. Use your judgement, it isn't brain surgery!

Pizza Pasta

Ingredients:
1 1/2 to 2 cups rotini pasta (corkscrews)
1 jar (1 lb. 10 oz.)pasta sauce with mushrooms
1/2 roll sausage, browned and drained
12 slices pepperoni, cut into 4
2 cups shredded mozzarella cheese
grated Parmesan cheese
dried or fresh chopped parsley

Other optional add-ins: sliced mushrooms, diced green peppers, diced onions, sliced black olives or any other toppings you like on your pizza would be good too.

Directions:
1. Cook rotini in boiling salted water until al dente. Drain well.
2. In a sauce pan, heat pasta sauce over medium heat. Add in sausage, pepperoni and any other optional ingredients.
3. After pasta is cooked and sauce is heated through, combine together and put in an appropriate sized baking dish.
4. Top evenly with shredded mozzarella cheese then sprinkle lightly with grated Parmesan cheese. Sprinkle with chopped parsley for color.
5. Bake at 350 degrees for 30 minutes until heated through and cheese is golden and bubbly.
6. Let sit for 5-10 minutes before serving.

Thanks for stopping by my kitchen!

LinkWithin

Related Posts with Thumbnails