Saturday, November 22, 2008

Italian Wedding Soup!


I've had Italian Wedding Soup many times but never thought about making it. That is until my best friend, Susan, asked if I had a recipe for it and put the idea into my head. I researched it online, read many recipes from many sites but hadn't decided on one that I wanted to try. I figured that I would end up combining a few of them until I came up with one that my family and I would like. Well as luck would have it, one of the guys brought some into work for all of us girls to try. It was just what I was looking for....almost. He graciously shared his family recipe as long as I promised not to tell his Mother. No problem. My lips are sealed. However, as always, I need to change things up a little bit. It was really good but there wasn't something quite right about his meatballs. When I told a friend at work that I had made it, she immediately said she wasn't fond of the meatballs....so I guess it wasn't just me. So of course, I have modified his family recipe to better fit my tastes and make this recipe my own.

Before I post the recipe, I should tell you that I like a heartier soup. As I've said before, Rachael Ray would call it a "stoup" and that pretty much describes it. So if you like it to be more "brothy," you can add more broth or cut down the amount of the pasta. Also, some people do not like a lot of garlic so I put on the recipe "to taste" so you decide if you want a little or a lot. It's your choice. Make it how you like it and be sure to share with your family, friends and neighbors. This recipe makes a lot and they will love you for it!

Cindi's Italian Wedding Soup

Ingredients for Meatballs:
1 lb. lean ground beef
1/2 cup bread crumbs
1/2 grated Parmesan cheese
2 T. dried parsley
1 large egg
garlic powder, to taste
1/2 t. salt
pepper, to taste

Remaining Ingredients:
5-6 boneless, skinless chicken breasts (about 20 ounces)
8 cans of College Inn chicken broth
3 chicken bouillon cubes
2 beef bouillon cubes
1 box of frozen chopped spinach, thawed
3 large eggs
3 T. grated Parmesan cheese
8 oz. of "Acini Di Pepe" pasta
3 "shakes" of Paprika

Directions:
1. Boil chicken in water in a large pot until thoroughly cooked. Cool and shred into bite sized pieces.
2. In a large bowl, mix together all of the meatball ingredients until well blended. Form into 1/2 inch sized meatballs and set aside.
3. Rinse the chopped spinach in a colander until the water runs clear. Drain as much of the water out of the spinach as possible.
4. To make the soup, bring all 8 cans of chicken broth, chicken bouillon cubes and beef bouillon cubes to a boil. Add the meatballs to the pot and simmer until meatballs are cooked through.
5. Add the prepped chicken, chopped spinach and paprika to the pot.
6. Whisk the 3 eggs until it gets foamy. Add 3T grated Parmesan cheese to the eggs. Stir the soup in a circular motion. While the soup is circling the pot, drizzle the egg/cheese mixture in a steady stream being careful not to add it all at once.
7. Add the Acini Di Pepe pasta to the pot, stir and simmer until the pasta done.

Garnish with more grated Parmesan cheese and serve with Italian bread.

One more thing before I go...Allison asked me why it's called Wedding Soup. I told her I don't know...maybe because they serve it at Italian weddings? She replied and said she thinks "it's because the flavors are united together." Well, I looked it up and she was basically right. How did she get so smart?!?!?!

Thanks for stopping by my kitchen!

***Edited to link up to: Tasty Tuesday at Balancing Beauty and Bedlam, Tempt My Tummy Tuesday at Blessed with Grace and Tuesdays at the Talble with All the Small Stuff.

Sunday, November 9, 2008

Philly Cheesecake Brownies!

If you haven't ever had or made Philly Cheesecake Brownies, you have to try these. They are so easy and offer up the "Wow" factor. I found this recipe years ago on a box of brownie mix and cut it out. I love cream cheese so I knew this was a must try. I don't know why but I kept it in my recipe box for years before making it. I now regret that decision. I can't believe I deprived myself of these yummy brownies for all those years! Anyway, the recipe is below and as you can see in the picture, I also sprinkle chocolate chips on it if I have them in my cupboard. You could probably stir them in if you like but I like picking them off the top when I eat the little square of deliciousness!

Philly Cheesecake Brownies

Ingredients:
1 pkg of brownie mix (I used the basic Betty Crocker mix.)
1 pkg (8 oz.) Philadelphia cream cheese
1/3 cup sugar
1 egg
1/2 teaspoon vanilla

Directions:
1. Prepare brownie mix as directed on package. Pour into greased 13 x 9 in baking pan.
2. Beat cream cheese with electric mixer on medium speed until smooth. Add sugar, mixing until well blended. Ad egg and vanilla and also mix until well blended.
3. Pour cream cheese mixture over brownie mixture; cut through batter with knife several times for marbled effect.
4. Bake at 350 degrees for 35 to 40 minutes or until cream cheese mixture is lightly browned.

Cool and cut into squares. Makes 24.

Thanks for visiting my kitchen!

Thursday, October 23, 2008

My Crock Pot Chili Recipe!


Although I love chili, I haven't made it in years. Allison wouldn't eat it and since I don't believe in cooking separate meals for the family, I would only order it out in a restaurant. Last week when we had dinner out, Allison tried it and LOVED it! She ate her whole bowl! I was so excited because that was my sign that I can make chili at home again. So last night I asked her if she would like chili for dinner tonight and she gave me a big smile and said "YES!" and then she said she can almost taste it now. How funny is she?

Cindi’s Crock Pot Chili

Ingredients:
2 pounds ground beef, browned and drained
2 - 15.5 oz. cans of kidney beans, drained and rinsed
2 – 14.5 oz. cans of diced tomatoes in juice
2 – 8 oz. cans of tomato sauce
1 medium onion, chopped fine
1 clove garlic, minced
½ green pepper, chopped fine
4 oz. mushrooms, chopped fine
3-4 Tablespoons chili powder
½ teaspoon salt
½ teaspoon pepper

Directions:
~Mix all ingredients together in a big bowl.
~Put mixture in a Crock Pot sprayed with non-stick cooking spray for easy clean up.
~Cook for 8 hours on low or 4-5 hours on high.

We like ours with soda crackers, shredded cheddar cheese and sour cream.

Thanks for visiting my kitchen!

Monday, October 13, 2008

I'll Be Back Soon!

I promise! I'll be back soon. I've just gotten off track. I'll be back with some comfort food to share with you soon!

Thanks for visiting my kitchen!


Sunday, October 5, 2008

Chicken Noodle Soup!

I'm sure everyone has a their own recipe for Chicken Noodle Soup and here is mine. This is how my Mother makes it and I saw no need to change it so I make it the same way. This is one of those recipes that there really isn't any measurements for the ingredients. You just sort of throw it in the pot as you go for the size of your family. I must think I'm feeding the Osmond's because I always seem to make a huge batch. That's okay, we always seem to eat it all...even if I have to share it with the neighbors.


Here are the participants: chicken, chicken broth, chicken bouillon, egg noodles, potatoes, carrots, parsley, black pepper and just imagine there is a can of green beans there. I forgot them until all the pictures were taken and the cooking was done.
First, put a big stock pot on the stove of water and get it boiling.
Once it's boiling, put your chicken in the hot bath. I use two boneless, skinless chicken breasts from Market Day. I also throw some other chicken in later but we'll get to that. You can turn down the heat once it starts to boil again.
While the chicken is cooking, I peel and dice the potatoes and slice the carrots. I use baby carrots because that's all I ever have in the refrigerator but you use what you like.
The chicken in the hot bath is probably done by now. Take it out, cool it and shred or dice it into bite sized pieces and set aside. Here's the other chicken I was talking about. I pulled this from my freezer. We love those rotisserie chickens from Sam's Club and the grocery store but there is always chicken left over. I clean the chicken off of the bones and use my "Seal a Meal" a.k.a. my "suck & seal" to save them for later use. I use the chicken for soup, pot pie, casseroles and anything else I need. The seasonings add such a special flavor to soup and pot pie, I like using it for them best.
I strain the chicken water and discard some of it. The chicken breasts don't really add a lot of flavor so that's where the broth comes in. I add it to the pot to get the desired liquid level in my pot. This is where I also add some chicken bouillon cubes. This is sort of a taste and see kind of thing. Be careful you don't add too many. You can always add more at the very end if you feel it needs it. Now you can add the potatoes and carrots to the broth. Cook these until they are a little al dente. They will cook more by the end of the recipe. You don't want them to be mush by the end.
Now it's time to add the chicken back into the pot.
And a hand full of parsley, some black pepper to taste and a can of drained green beans.
Bring the pot back to a boil.
Next it's the egg noodles turn to jump into the pot. I add about 3 cups of big egg noodles to my pot because we like a lot of noodles. After I add the noodles, I turn the pot off and cover it with a lid. Let it sit until the noodles are done.. The noodles will cook perfectly and the soup will not be boiling hot for dinner.
Yum! Doesn't that look good. Just imagine the green beans are in there! I know potatoes aren't usually in chicken noodle soup but we like it....especially Curtis. They break down a little and make the broth a little thicker. Also, as with most soups, it's better the second day!
As I stated earlier, this recipe is hard to write out since it all depends on how much you want to make or what you have on hand. I'm speaking of the chicken since I use both raw and cooked. You can also cook whole pieces and use that. My advice would be to use the above instructions as a guide when making your soup. If you have any questions, please let me know.
Cindi's Chicken Noodle Soup
Ingredients:
Chicken
Chicken Broth
Chicken Bouillon cubes
Potatoes, peeled and diced
Carrots, sliced
Can Green Beans, drained
Dried Parsley
Black Pepper
Egg Noodles
Directions:
~Bring a pot of water to a boil. Add chicken and cook chicken until it's done. Remove from water to drain. When cooled, shred or dice and set aside.
~Strain water and discard part of it. Add chicken broth and bouillon cubes as needed.
~Cook potatoes and carrots until almost done.
~Add chicken back to pot.
~Add parsley, black pepper to taste and green beans.
~Bring pot back to boil and add egg noodles. Turn the heat off and cover until the egg noodles are done.
Thanks for visiting my kitchen!

Monday, September 29, 2008

Outrageous Cookie Bars!

One of the girls at work brought these in a few years ago. They were so good that I knew I had to get the recipe. They even have coconut in them and as a general rule, I avoid coconut. I actually like the flavor of coconut but I don't like the texture. I don't like the sound it makes when you bite it and I definitately don't like how you can't seem to bite through it. I know. I'm odd. I've never denied it and now you have proof.

Many of you probably already have this recipe. It seems to be a holiday favorite on cookie trays. I guess I never noticed it before since I usually avoid all cookies with coconut in them. After these cool, I cut them into squares and put them in decorative cupcake papers. It just adds a special touch to the cookie tray.

I made these a couple of weeks ago for one of Curtis's bosses at work as a thank you for letting us park at his house for Allison's Open House at school. There is seriously not enough parking at the school. We are told to park down the road at a grocery store and they shuttle us back and forth. Fortunately his boss lives several houses down from the school so he lets us park there. I wanted to make sure he knows we appreciate our own private parking space and what better way to do that but with home baked goodies?

Outrageous Cookie Bars

Makes 48 bars

Ingredients:
1/2 cup butter
1 1/2 cups graham cracker crumbs
1 (14-ounce) can sweetened condensed Milk
1 (14-ounce) package semi-sweet chocolate chips
1 cup sweetened flaked coconut
1 cup chopped walnuts

Directions:
1. Preheat oven to 350° F.
2. Melt butter in a 13 x 9-inch baking pan in the oven. Remove the pan from oven and sprinkle with the graham cracker crumbs over butter. Stir the two together well and press it onto bottom of the pan.
3. Pour sweetened condensed milk over the crumbs evenly
4. Next sprinkle with the crust with the chocolate chips, coconut and nuts. Press down firmly.
5. Bake for 25 to 30 minutes or until light golden brown.
6.Cool completely in pan on wire rack.

The picture below shows you how I packaged them up for delivery. I had purchased some take-out containers from work a couple of years ago for a bake sale I did. I still had some in my stash and it worked perfectly for 2 layers of 9. I matched the ribbon to the holiday papers and ended up with a festive thank you. As you can see, it doesn't take a lot of money to show someone they are appreciated.

Thanks for visiting my kitchen!

Sunday, September 28, 2008

Crock Pot Swiss Steak!

I tried a new recipe for Swiss Steak in the Crock Pot or slow cooker. Although Curtis liked the recipe I used previously, I thought the tomato flavor overpowered the dish. This new recipe is just perfect for me. I put it in the Crock Pot on Thursday because I wasn't sure how long I was working that day. I wanted to have dinner ready for them just in case. Good thing I did too because I didn't get home until after 7:00. Part of my new healthier eating is not to eat after 7 pm so I had something little for dinner earlier. However, when I got home the house smelled so good from the Swiss steak cooking all day that I had to have a little. This picture is of my little. I must have said "Mmmm" ten times while I was eating this. Curtis had 2 1/2 helpings and Allison loved it too. Next time I'm going to try fat free gravy in it. I wanted to this time but the store didn't have any. The only change I made in their recipe was to dredge the steaks in seasoned flour before browing in the skillet.

Crock Pot Swiss Steak
(adapted from Betty Crocker)

Serves 6
Ingredients:
1 1/2 pounds beef boneless round steak
1/2 cup flour
1/2 teaspoon peppered seasoned salt
6 to 8 new potatoes, cut into fourths
1 1/2 cups baby-cut carrots
1 medium onion, sliced
2 cups petite diced tomatoes with Italian herbs, undrained
1 jar (12 ounces) beef gravy
Chopped fresh parsley, if desired
Directions:
1. Mix flour and seasoned salt together.
2 Cut beef into 6 serving pieces. Dredge through flour mixture. Spray 12-inch skillet with cooking spray; heat over medium-high heat. Cook in skillet 6 to 8 minutes, turning once, until brown.
3. Layer potatoes, carrots, beef and onion in 4- to 5-quart Crock Pot or slow cooker. Mix tomatoes and gravy; spoon over mixture in slow cooker.
4. Cover and cook on low heat setting 7 to 8 hours or until beef and vegetables are tender. Sprinkle with parsley.
Prep time: 15 minutes
Cook time: 8 hours

Thanks for visiting my kitchen!

Monday, September 22, 2008

Cucumber and Tomato Salad!

This recipe is unbelievably simple to put together but packs the big "WOW" factor. I made it yesterday for our Parish Picnic. Afterwards I brought home the big bowl with six lonely cucumber slices floating in the bath of leftover dressing and one serving spoon that sunk to the bottom. I'll be returning that to the church kitchen this Sunday after Mass. Mind you, I used 6 large cucumbers and 10 medium vine rip tomatoes in it. There was so much food there and so much left over. It made my heart happy that my bowl, the sweets table and a few other casserole dishes were the only ones empty. After all, isn't that one of the reasons us cooks cook? We love it when others love our food!

Although I can take the credit for the parishioners loving this dish, I can't take credit for this recipe. It came from a lovely lady in Utah named Sophia. I've been reading her personal blog for well over two years. In addition to being a great Mom, she has some great recipes with this being one of them. She, like me, has recently started a cooking blog to share her recipes with all of us. Here is the link to this recipe. While you are there, look around and see what other goodness she cooks up!

Here is her recipe directly from her site with her permission. Thanks Sophia!

Cucumber & Tomato Salad

Ingredients:
cucumbers and tomatoes, chopped (I use at least 3 or 4 of each)
1 sliced and slightly chopped onion
1 cup sugar (I add an extra 1/4 cup)
1 cup cider vinegar
4 Tbsp. oil
1 Tbs. salt
pepper to taste (I use lots!)

Directions:
Mix the dressing and pour over the chopped veggies.
Chill and serve!

Okay, you know I usually don't make a recipe as it but this one I did. I will tell you that I used red/purple onion because it's my favorite onion and added a touch of pretty to the cucumbers and tomatoes. I also didn't add the extra 1/4 cup of sugar and it was yummy anyway. I would suggest you start with the cup and then if you want it sweeter, then add more. Remember, you can always add but can't take away from a recipe once you've dumped it in.

Also. Since there are only three of us in my family, I've made it with 1 cucumber, 1 tomato and a cubanelle pepper from my Dad's garden. I cut the recipe by 4 when I did this or we would have been drinking the dressing. When I did this, I also substituted 4 packets of Splenda sweetener instead of the sugar to fit into my healthier eating habits these days. Although it wasn't as good as the sugar one, it was still good an we had no trouble eating the whole bowl!

Thank you for visiting my kitchen!

Sunday, September 21, 2008

Banana Foster French Toast!

There is a local restaurant chain around here called Eat'n Park. They have Bananas Foster French Toast. My Curtis LOVES it! I thought that I could probably figure it out. How hard could it be? Well. It wasn't. At all! Curtis claims that I hit the mark. Allison had it for the first time yesterday. She now claims she wants it for her birthday breakfast from now on too. Oh, it was Curtis' birthday yesterday. That's why I made it for him. He usually gets it on Father's Day and his birthday. If he wants it any other time, he needs to request it or bring a bunch of bananas home.

It's hard to tell in the picture but there is french toast under all those bananas. Curtis likes the bananas so I don't hold back. The syrup/sauce is also dark. This is because I used dark brown sugar instead of light brown. It's what I had on hand from sending him to the store one time and not specifying light. It works fine too. It's just a little darker, more flavorful and richer since it has more molasses in it.

I make the French toast as I normally would except I substitute a speciality bread. My favorite is Pepperidge Farm cinnamon swirl bread. The cinnamon and raisins would be good too. So that's it for the French toast part of it. What makes this dish special is what happens in a sauce pan.

Banana Foster French Toast

Ingredients
1 stick of butter
1 cup of packed brown sugar
1 teaspoon vanilla
1/2 teaspoon cinnamon
bananas (I use 1 for the sauce and 2 for on top of the french toast.)

Directions
~Make French toast as normal using a specialty bread such as a cinnamon swirl.
~In a small sauce pan on low melt the butter and add the brown sugar until the sugar crystals melt.
~Add the vanilla and cinnamon and stir occasionally to avoid burning.
~About three minutes before you are ready to serve, slice in one to two bananas into the sauce. They don't need to cook but just warm through.
~Place French toast on individual plates and slice more bananas on top. (As many as you like.)
~Drizzle with banana foster sauce. Use this sparingly as it is very sweet.
~Canned whipped cream would also be excellent on top!

If you think this may be too sweet for breakfast, another idea is to cut French toast into cubes. Place cubes and sliced bananas over vanilla ice cream, cover with warm sauce and top with whipped cream for warm fall dessert.

Thanks for visiting my kitchen!

Friday, September 19, 2008

Pierogi Skillet Dinner!

This recipe is quick, quick, quick! You can have it on the table in 15 minutes. It also can be served out of the skillet but I put it in a bowl so I could take a pretty picture for all of you.

I found this recipe a few years ago in a Woman's Day magazine. Of course, I had to change it a little to fit my family. It actually called for frozen peas but the other humans in my family don't eat peas by themselves. I know. They are odd. It also called for 1 chopped medium onion. I've never used it because it slows down "the dinner on the table in 15 minutes thing" which is why I like this recipe. I really don't think it needs it. It has lots of flavor without adding the onion. If you try the recipe and put the onion in it, let me know how it turns out!


Make sure you read the directions through before you start. It may look long but is actually really easy. The clean-up is a breeze too. Any questions, please let me know!

Pierogi Skillet Dinner
Ingredients:
1 Tbsp. olive oil
1 lb. smoked sausage (I use lite. The WD recipe called for kielbasa)
1 box of mini pierogies (I use the potato and cheese but use what ever your family likes)
2 cups of frozen mixed vegetables.

Directions:
~Cut the smoked sausage diagonally into 1/2 inch thick slices.
~Put a large pot of water on high to start it boiling. Once boiling add the frozen vegetables. Stir to prevent sticking. Make sure you don't over cook the vegetables. You will be adding them to the skillet and they will continue to cook there. You'll want to bring the water back to a boil so you can add the pierogies into the same water with the vegetables.
~Heat oil in a large non-stick skillet over medium high heat.
~Add smoked sausage to oil and cook until browned.
~While the sausage is browning, it should be time to add the pierogies to the vegetables and water. Be careful...these cook quick.
~As soon as the pierogies float, strain the vegetables and pierogies.
~Add the vegetables and pierogies to the skillet and continue to cook until the pierogies brown a little.

This recipe serves 4. I do not add salt or pepper to this recipe. I think it's salty enough with the smoked sausage and I put a pepper shaker on the table for those who want it.

Thanks for visiting my kitchen!

Thursday, September 18, 2008

Banana Brownies!

Okay, I had a complete recipe typed up and ready to go and then it went bye-bye! So since I don't have the time to redo the entire entry today, I thought I would share a sweet treat with all of you today. I got this recipe from Stacy Julian's blog. I thought it was sounded interesting so I thought what the heck! I'll try it. Oh. My. Goodness! They are so moist and so delish! You'll have to try them when you have some mega ripe bananas sitting on your counter!

Banana Brownies

3/4 cup butter (soft)
2/3 cup sugar
2/3 cup brown sugar
1 egg
1 tsp vanilla
2 ripe bananas (mashed)
2 cups flour
2 t baking powder
1/2 t salt
chocolate chips (I use about 1 cup?)


~Mix everything together, spread into a 9"x13" pan and bake at 350 degrees for 25 minutes.
~Let cool and enjoy (don't over bake -- they look a bit "undone" sometimes, but will firm up.)

Thanks for visiting my kitchen!

Sunday, September 14, 2008

My Ba Ba's Halupki a.k.a. Stuffed Cabbage


If you are a reader to my first blog, I know you have already seen this recipe. Please bear with me because when I was deciding what recipe to share to post on my new blog first, this immediately came to mind. First, because it's my favorite food and I could eat it for breakfast, lunch and dinner. Second, because with the weather getting warmer and it's definitely comfort food. And lastly, it tops the list of most searched items on my other blog. So it was a no brainer to share this. Now before you look at this recipe, some of the pictures are blurry. I am not a photographer, but I am working on that. So in the meantime, I'm sorry. I also will probably not be sharing step by step pictures of all my recipes. I will do it if I feel it's necessary to help you in the cooking process or if the mood strikes me. Who knows. You'll just have to stay tuned to find out. Now...onto the recipe!

This recipe if from my Ba Ba (my Polish/Slovak Grandmother) and the entire recipe is printed below but I'll start at the beginning here.

The participants: 1 large head of cabbage or 2 small, 2 lbs. of ground beef, 3 cans of tomato soup, ketchup, 2 eggs, minced dried onions, rice (not instant), salt and pepper.

Take a big stock pot out of your cupboard and fill it 2/3 full with water. Place it on a big burner and turn it on high.

While that's boiling, grab your head of cabbage or cabbages. Take off those ugly dirty outside leaves. If you take off some of the dark green ones too, that's okay. They tend to be a little bitter.

Now go and grab a sharp knife. BE CAREFUL...don't cut yourself! I grabbed one of my new Chicago Cutlery that I received for my 15th anniversary at work last year. See, it's all shiny and new looking! Anyway, you'll need to cut out the core. Just keep putting your knife in and out until you make it all the way around.

See this is what it looks like. You want to do this so it makes it easy to peel off the leaves. They won't be attached to anything and will fall right off.

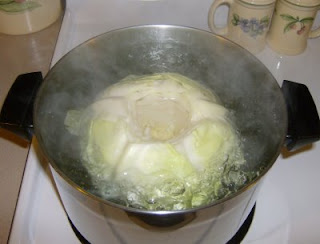
Now place the cabbage in the water. Wait! Do it carefully! That water is getting hot! I turn the head around to get some water in the hole that you cut out.

Now let's go and get started on the insides of the Halupki. Grab your favorite big bowl. I picked my Ba Ba's Pyrex one...it's my favorite. Break both pounds of ground beef up and place it in the bottom of the bowl.

Next let's throw in some minced dried onions. I put 2-3 tablespoons in the written recipe but as you can see, I use the palm of my hand and just throw them in. I'm sure some of you are thinking that fresh onions would be better here and if you want to use those, have at it. I know the juice of the onion is probably the best part but I personally like the hint of onion that dried onions offer. I don't want my Halupki being overpowered by fresh onions. Anyway, this is easier and this is how my Mom did it so that's how I'm doing it!

Don't forget to check on the cabbage! When it comes to a boil, turn it down so it barely keeps boiling. Mine came to a rolling boil because I was too busy trying to be a photographer!

Add your two eggs. Are you wondering how I took this picture? I used my chin to press the button. No really, I can not tell a lie! I used Curtis...he's my sweetie.

I know this is blurry but can you see that I added the salt and the pepper? I know, I'm bad. I don't measure those either. I can tell you this. I add more pepper than salt. I barely use salt in anything I cook.
Now throw in that cup of rice. I did measure this as you can see. I usually mound my cup but this time I threw in a little more than a mounded cup. There was about an 1/8 of a cup left in the container and I figured what was the point of letting them sit in the container all by themselves.
Check your cabbage. Can you peel any of the outer leaves off yet? You might only be able to get a couple but that's okay. Just put them in a colander in the sink to drain and cool.
Ya baby! Come to Ma Ma!
Let's get back to the mix. Add 1 can of tomato soup. I only ever use Campbell's but be brave and go for whatever brand you want. I'm a chicken when it comes to my tomato soups so I'll stick to Campbell's, thank you!
Again, you'll see me using no measuring device here. I know, I know, I'm a naughty girl. Throw caution to the wind and just squirt! But be sure you are using Heinz ketchup! Hey, what did you expect from me? I'm a Pittsburgh girl! There is NO other ketchup!
Now mix everything together really well.
Oh heck! It's my dinner! I'm using the best utensils God gave me...my hands! Don't worry, I washed them before touching the raw meat...and BELIEVE ME...I washed them well afterwards with anti-bacterial soap. You should too!
Here it is. The finished mix. It's going to be a little wet than you probably expected but that's good. If it was a dry mixture, you would have hard little meat/rice balls inside. You need the moisture because the rice will suck it all up.
Hey! Wait! What is this? We are making Halupki...not Stuffed Peppers!
Okay, okay, I confess! I'm making them for Curtis. He's not really as crazy about Halupki as I am. He's crazy over stuffed peppers so I thought I would be nice and make him his favorite.
I'm taking a side road here. When you make stuffed peppers, just take the pepper and cut the top off. Take the insides out and wash the pepper inside and out. Fill it with the mix and voila! You've got stuffed peppers!
Let's get back on track here. It's hard to see in the picture but the leaves have this big thick vein where it was attached to the core. You will need to thin it out or it's very tough. Just grab a sharp knife and BE CAREFUL! Can you tell I'm afraid of people getting cut here?
See how easy this is? Don't cut the vein out altogether or you won't be able to assemble the Halupki. Oh, please ignore the fact that I'm cutting towards myself. You know you are not supposed to do that, right? Also did you know that a dull knife is more dangerous than a sharp knife? Yup, it is. When you use a dull knife, you need force behind the knife to cut through something and a sharp knife will glide through the item you are cutting. There. That's the extent of my culinary knowledge for the day! Are you impressed?
By the way, this would be a good time to preheat your oven to 350 degrees Fahrenheit.
My little pile of veins. I don't know why I took a picture of this. I guess I'm just odd.
Now it's time to get assembling, baby! Open a leaf and set it down on the counter/plate/cutting board...whatever your little heart desires...with the vein part towards you. Place a little bit of the mixture on the end over the vein. Next fold the right and left sides in towards the center and....
.....ROLL! ROLL! ROLL!
After you roll them, place them in a roaster with the seam side down. I guess you could use a covered casserole or something else that's big. This recipe will make a good amount and you also want space for the sauce/juice. He he he. Look what I did with the stuffed peppers. I make a little square pan thingy with triple layers of heavy duty aluminum foil. I didn't want that yucky stuffed pepper juice dancing with my yummy Halupki juice.
Next cover the little pretties with 2 cans of tomato soup. Now let's get that ketchup bottle again and squirt some more over the top. Please don't ask me how much...I don't know. I just kind of squirt in a zig-zag fashion. Technical isn't it? Oh, and here is where you want to pour about 3/4 of a can of water over the whole thing. I toss the water back and forth between the three empty cans of soup so I can rinse out all the goodness still left in the can that scraping didn't get.
Now cover the roaster and put it in your preheated 350 degree oven for 1 1/2 hours.
Oh my! Looky what we have here! Yum! I need to make these more often!

Cindi's Family's Halupki (Stuffed Cabbage Rolls) Recipe

1 large head of white cabbage or 2 small (I like two small because the cabbage is more tender)
2 lbs. ground meat
1 c. white rice (not instant)
3 cans tomato soup
2 eggs
salt & pepper (a few shakes of each)
2-3 T. dry minced onion
ketchup

~Cut core out of cabbage head and cover with boiling water in large stock pot. Boil cabbage until leaves begin to fall off the head with a little help from you. I stand at the stove and peel one leaf off at a time. Drain leaves. With a sharp knife thin out veins along the spine of each cabbage leaf. Do not cut the vein out.

~Mix together ground beef, rice, 1 can of tomato soup, eggs, minced onions, salt, pepper and not quite a 1/4 cup ketchup.

~Assemble cabbage rolls. Lay the leaf with the vein part towards you, put a little of the mixture on top of the vein, fold in the sides and then roll. There is no set amount to put in each leaf because the size of the leaves vary. Place in roaster with the seam side down. I place the larger ones around the outside of the roaster. I also cut up the remaining cabbage in approx. 1 inch squares and place on top.

~Pour the remaining tomato soup (2 cans) over the top of the cabbage rolls. There is no measurement to this but squirt ketchup over the rolls in a sporadic fashion. Not too much...don't cover the entire top...kind of like if you were putting chocolate syrup over a sundae. But make sure you put enough on it because it adds the "tang" to the tomato soup. Next pour a little more than 3/4 of a can of water over the entire mixture.

~Cover and cook for 1-1/2 hours at 350 degrees. If you make more than 2 pounds of ground meat, you'll need to cook it longer.

Thanks for visiting my kitchen!

LinkWithin

Related Posts with Thumbnails